
Lesson 2: Setting up Your Option C Project
Lesson 2 shows how to create the structure of a new project, including the arrangement of sites, buildings, and meters.
Creating a Project File
Open Option C, then load the project used in the previous tutorial, or create a new one.
As in lesson one, we’ll see a blank project:
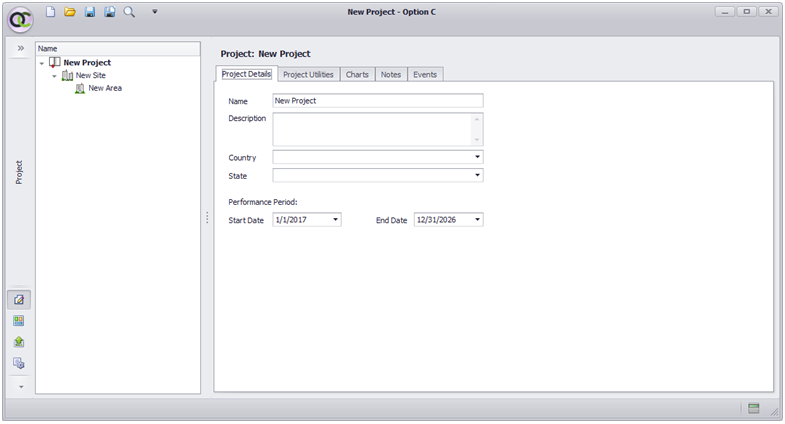 Figure 2.1: A New Option C Project
New projects in Option C begin with a Project, Site, and Area item. We’ll add other items later.
Entering Project Information
Begin by customizing the project:
- Select the Project Item to display the Project Details data form, as in Figure 2.1 above.
- Select the Project Details tab.
- In the Name field, enter Gulf Medical Center, so it replaces New Project. This is the name that identifies the Project.
- In the Description field, enter Gulf Medical Center: Columbus, Ohio. This is a name that describes the facility more completely.
- Select United States for the country and Ohio for the state. These will be automatically applied to the Child items of the project (the Site and Area).
- Finally, enter 1/1/2017 and 12/31/2026 as the Performance Period Start Date and End Dates, respectively. These represent the time period following your base year, which you wish to evaluate for savings.
There are no ‘OK’ buttons in these forms. Entered data is automatically saved.
The Project Details are now complete:
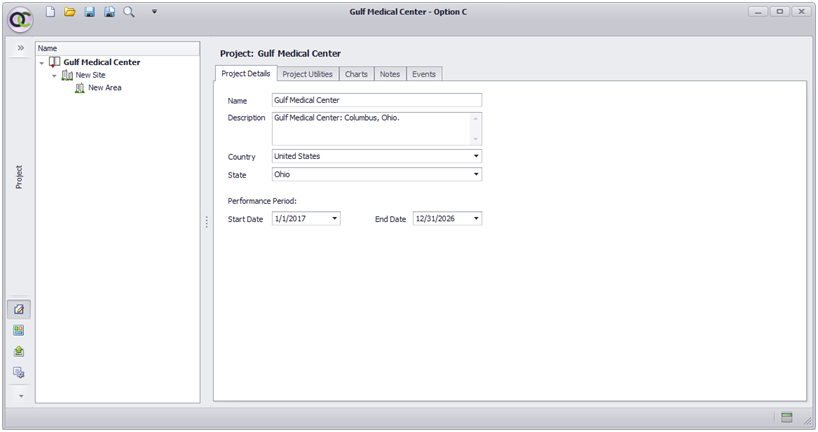 Figure 2.2: Completed Project Details Form
Entering Site Information
The next step in the layout is to define the Sites for the Project. For example, if your Project were a school district with five different elementary, intermediate, and high schools, you might have five different Sites. This sample Project is just a single building, so it needs only one Site. There’s no need to add a new Site Item. Simply enter the appropriate data for the one Site Item that Option C automatically included when the new Project was created.
1. Select the Site Item to display the Site Details data form.
2. In the Name field, enter Center Site, which will be used in the label for this Item.
3. In the Description field enter Medical Center Site.
4. Note that the country and state selections from the Project level have been applied here.
5. Option C automatically sets the Current Floor Area (SqFt) field to the sum of all Areas that are part of this Site. Since you haven’t entered information about the Area yet, this is currently 0. Option C will fill it in later.
6. In a coming lesson, we will import and assign weather data to this Site. For now, leave the Weather field blank.
The Site Details data form is now complete:
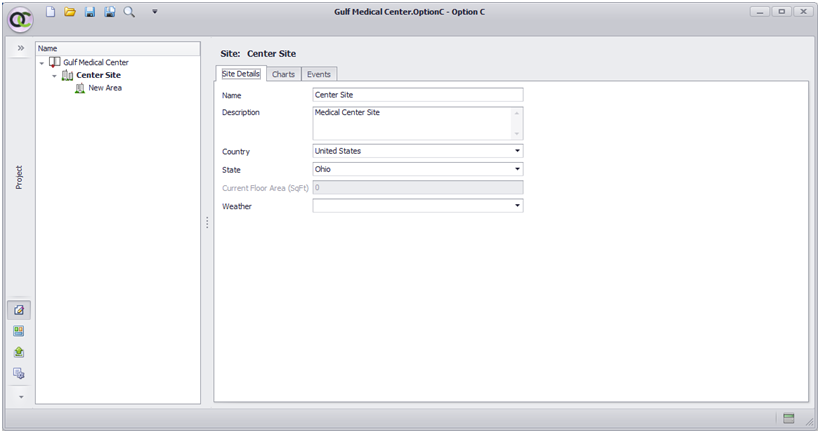 Figure 2.3: Completed Site Details Form
Entering Area Information
Each Site consists of one or more Areas. Usually, an Area is an individual building, though it can also be part of a building (such as a wing) or a group of buildings, or perhaps not even a building at all (for example, outdoor lighting). An Area is defined by the utility meters that serve it. Since this sample Project will have only one electric meter and one gas meter, which both serve the entire building, only one Area Item is needed.
1. Click on the Area Item to display the Area Details data form.
2. In the Name field enter Med Ctr Building, which will be used in the label for this Item.
3. In the Description field enter Medical Center Building.
4. Note that the country and state selections from the Project level have been applied here.
5. Area information, including Building Area Square Footage, Percent Conditioned, Percent Heated, Weekly Operating Hours, Workers on Main Shift, Number of PCs, and Comments, can be entered in the table at the bottom of the form. An Effective Date, indicating as of when the information is current, can also be entered.
The Area Details form is now complete. An example of the completed form is shown below:
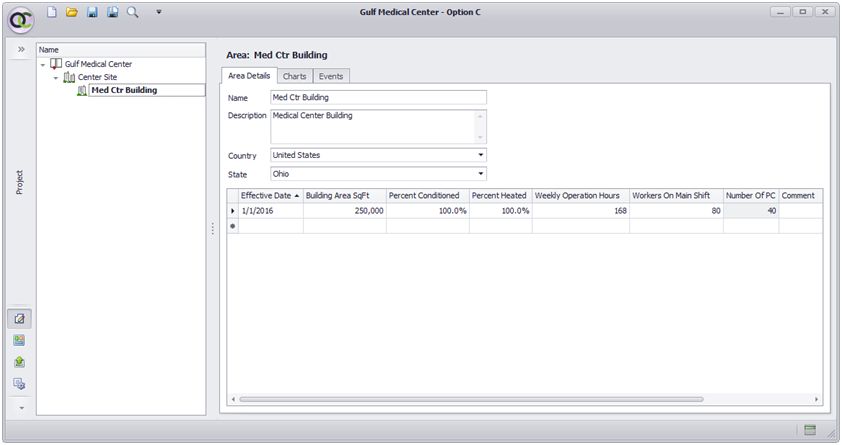 Figure 2.4: Completed Area Details Form
Adding New Meters
Our sample project will need two Meter Items, for an electric and a steam meter. Both need to be added.
To add any new Item to the project, right click the Item to which it will be attached, and choose from the resulting menu. Add a Meter to the Area item:
1. Right-click the Med Ctr Building Area in the Tree Diagram.
2. From the resulting menu, choose New Meter. Figure 2.5 shows the Menu command:
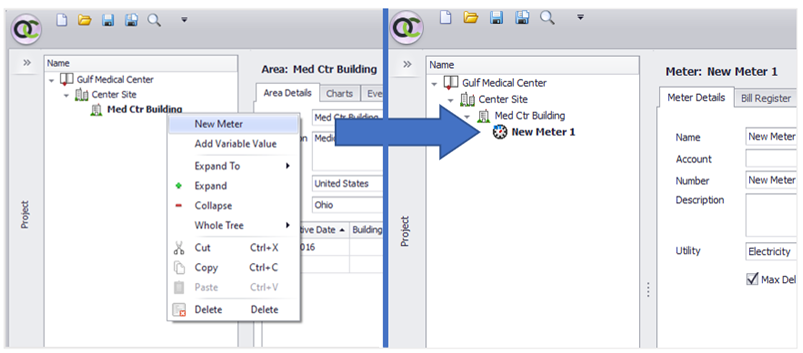 Figure 2.5: Adding a New Meter
A new Meter item is added below the Area.
3. Select the new Meter item, to display the Meter Details data form.
4. In the Name field enter Electric Meter, which will be used in the label for this Item.
5. In the Account field enter 12345. This field indicates the account number associated with the meter. (We will use a placeholder in this example.)
6. In the Number field, enter Electric Meter. This field indicates the meter number.
7. In the Description field enter Primary Electric Meter.
8. From the Utility dropdown menu, select Electricity.
The Meter Details form is now complete. An example of the completed form is shown below:
 Figure 2.6: Completed Meter Details Form (Electric)
In a coming lesson, we will explore the Bill Register tab, and import utility data to this Meter. For now, we’ll move on.
Repeat these steps to add a second Meter to the Med Ctr Building:
1. Right-click the Med Ctr Building Area in the Tree Diagram.
2. From the resulting menu, choose New Meter.
3. Select the new Meter item, to display the Meter Details data form.
4. In the Name field enter Steam Meter.
5. In the Account field enter 12.
6. In the Number field, enter Steam Meter.
7. In the Description field enter Primary Steam Meter.
8. From the Utility dropdown menu, select Steam.
The Steam Meter Details form is now complete. An example of the completed form is shown below:
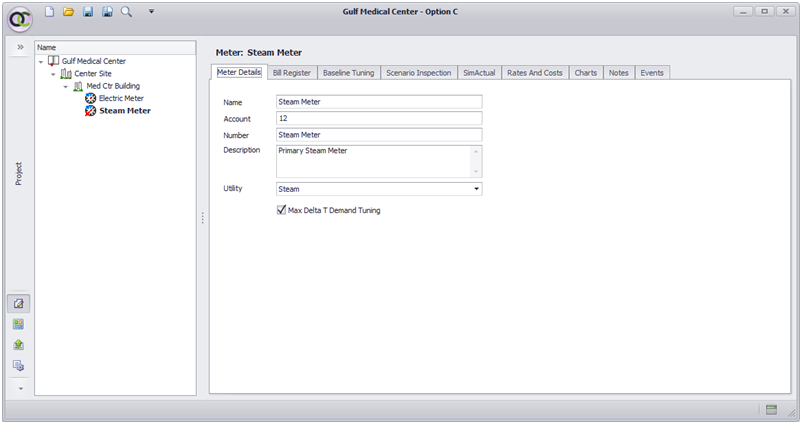 Figure 2.7: Completed Meter Details Form (Steam)
Both utility Meters are now added and set up.
Our project layout is complete. In the next lesson, we will import bill data to these meters.
<--Previous lesson Next lesson–>
- Lesson 1: Getting Started in Option C
- Lesson 2: Setting up Your Option C Project
- Lesson 3: Importing Bill Data into Your Option C Project
- Lesson 4: Importing Weather Data into Your Option C Project
- Lesson 5: Tuning Your Data for Weather
- Lesson 6: Adding Measures
- Lesson 7: Adding Baseline Modifications
- Lesson 8: Reporting