
Lesson 4: Importing Weather Data into Your Option C Project
Lesson 4 covers importing weather data into Option C. Weather files are typically purchased from weather providers, and are imported into Metrix, although some users type in weather themselves.
If comparing data from year to year, and not planning to tune your meters for weather, no weather data needs to be entered. (Tuning is covered in Lesson 5.)
Weather Data as a Variable in Option C
In this section, you will enter historic weather data to your project. Weather (outdoor air temperature) is a variable that affects utility use, and must be tracked in order to determine accurate savings.
(Other Variables can affect utility usage too. For example, the number of meals served per month at a cafeteria may affect water usage, or the weekly production quantity at a manufacturing plant may affect electric usage. These variables are covered in a later lesson)
For this sample project, weather will be included as a variable affecting electric and steam usage. Weather Items are assigned to Site Items, since a Site is a unique geographical location that has its own weather patterns. You can import historic weather patterns for a given city from an external file. It is important to enter the correct Source Location ID, as shown in the exercise, because Option C uses this ID to match the imported data with the corresponding project Weather Item.
Creating New Weather Items
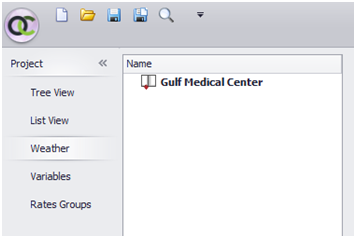
1. Click on the left side menu, then select the Weather option. This opens the Weather menu. Note that no data is yet entered, and no weather items appear in the list.
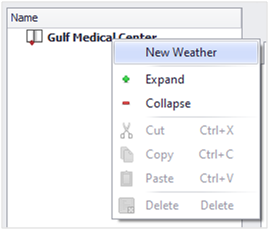
2. Let’s first try adding a weather item manually. Right click the project name: Gulf Medical Center, and select, New Weather:
A Weather Item is created. It is added to the weather list, and the weather information appears in the data panel:
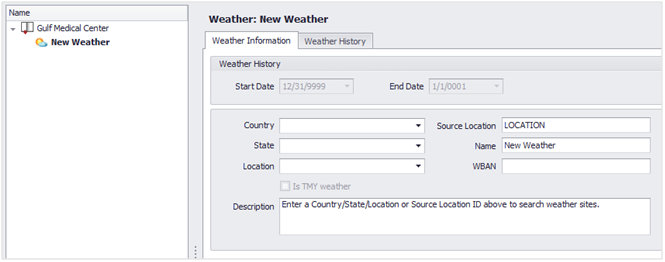
3. In the Weather Information tab, type in or select a Country, State, and Location from the dropdown menus to select a weather location. If you know the Source Location code (usually the three-character airport code), you may also search for weather locations using it.
Here are some example Source Locations you may experiment with:
- SFO – San Francisco, CA
- LAX – Los Angeles, CA
- NYC – New York City, NY
- GATB – Timbuktu, Mali
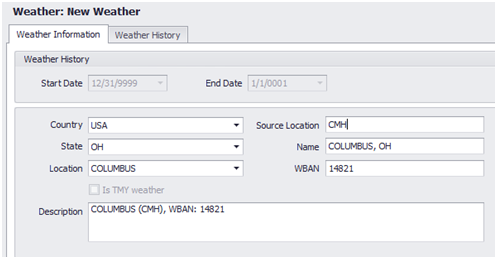
Now enter CMH, for Columbus, Ohio, as above.
Option C automatically fills in all the remaining fields once a location is selected. Option C also fills in all the fields automatically when importing weather data from an external data file. Usually, users will import a data file first, and allow Option C to set up the Weather Item. If creating Weather Items manually, for future import, be sure to enter the correct Source Location, so that the imported data can be matched with the Item.
4. Click on the Weather History tab. This is where the weather data register and graph can be viewed. The register for our new Weather Item is currently empty, but we’ll revisit this after importing data.
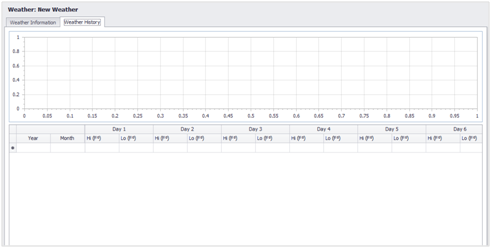
Data can be manually entered into the register, or pasted from Excel. Most users prefer to import data from external files, which we’ll cover in the next steps.
Importing Weather Data
While it’s possible to manually enter data, for simplicity and ease, let’s import data directly from a prepared weather data file. (Note that when setting up future projects, it is not necessary to create a weather item manually prior to data import. Option C will do this automatically; the examples above were merely academic.)
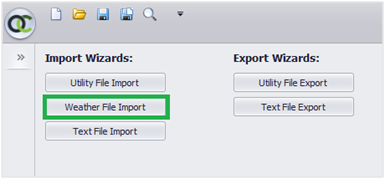
1. Click on the Import icon, in the bottom left of Option C. In the Import Menu, select Weather File Import.
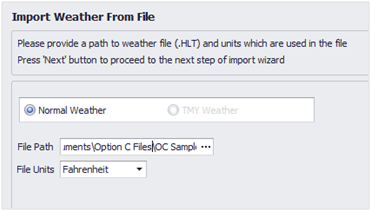
2. Click the ellipsis (…) under File Path, to browse for: “OC Sample Proj Weather Data.hlt”. (This will be located under My Documents/Option C.) Make sure Fahrenheit is selected for File Units, then click Next.
3. Imported data is now matched to existing project Weather Items. If matches aren’t found, new Weather Items are created. You may view or adjust the import action, under the Import Action column.

- Click Import to proceed.
- After the confirmation screen, click ‘OK’ to return to the Import Menu.
- Now return to the Weather Menu. First, click on the Project icon, in the bottom left, then select Weather from the left side menu.
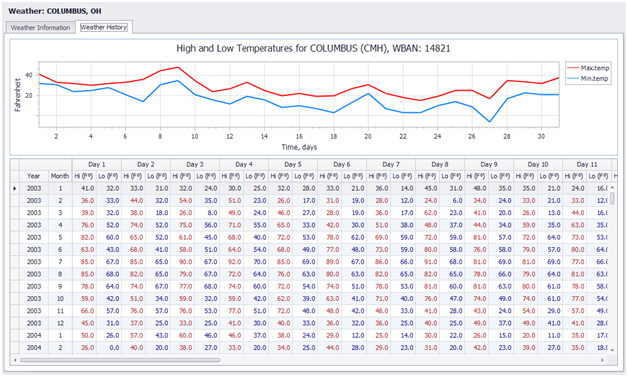
- Click on the Weather Item for Columbus, OH. The Weather Information and Weather History tabs should both be updated, and historical weather data for 2003-2016 should appear:
Weather Import is now complete.
To update this Weather Item with new data in the future, simply repeat the steps above with the new data file(s). If the Source Location codes match, the new data will be added to the weather register.
Now that weather has been added to our project, the next step is to assign it to Sites.
Assigning Weather Data
Weather data in Option C must be assigned to Sites before it can be used as a variable for tuning. To assign a Weather Item to a site:
- Return to the Tree View. (Click the left side menu, and select Tree View.)
- Click on the Center Site.
- In the Site Details tab, select Columbus, OH from the Weather dropdown.
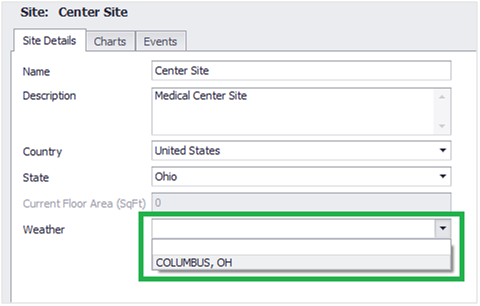
The Columbus Weather Item has now been added to the Center Site. It will be available for use in Tuning, in the next lesson.
<--Previous lesson Next lesson–>
- Lesson 1: Getting Started in Option C
- Lesson 2: Setting up Your Option C Project
- Lesson 3: Importing Bill Data into Your Option C Project
- Lesson 4: Importing Weather Data into Your Option C Project
- Lesson 5: Tuning Your Data for Weather
- Lesson 6: Adding Measures
- Lesson 7: Adding Baseline Modifications
- Lesson 8: Reporting