
Lesson 1: Getting Started in Option C
Lesson one teaches the basics of working in Option C, and introduces the user interface.
Starting Option C
First, let’s open Option C. To launch Option C, find the program folder in your Start menu Programs list, then click Option C. (If you have an Option C desktop or Start Menu shortcut, you can also launch it directly from there.)
An empty Option C frame will come up, as shown below:
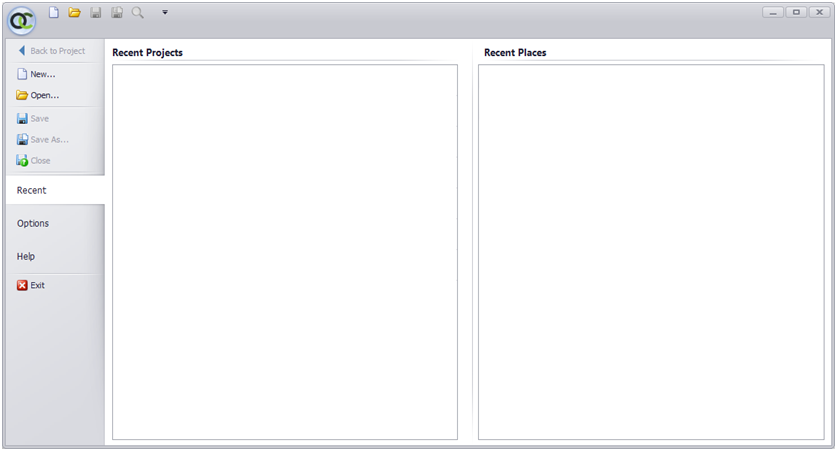
On future start-ups, any recent projects or folders will appear in the left and right panels, respectively.
Creating a New Option C Project
To create a new Project, click the ‘New’ icon in the left side bar. An empty Option C Project will appear. The Project already has a few items stocked in it, which we will review later. In Figure 1.2, below, we have clicked on the New Project item:
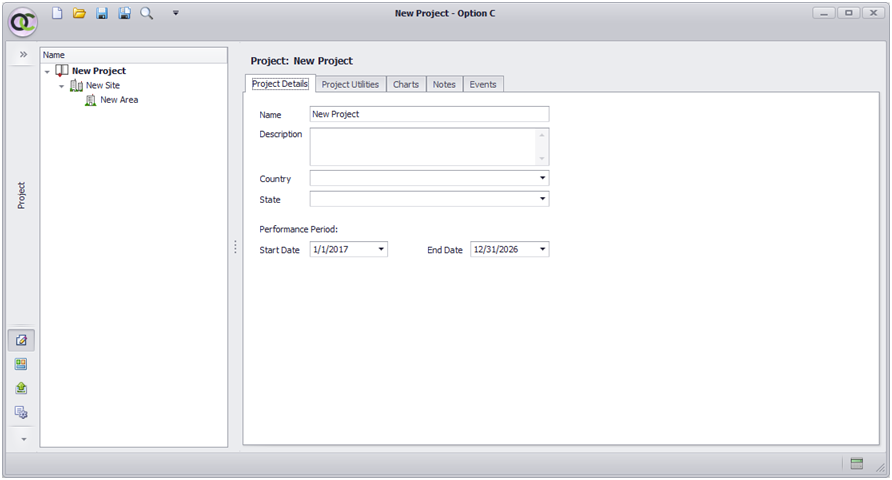 Figure 1.2: The Option C Display
For each open Option C Project, there are two panes: the pane on the left is a tree diagram that displays the items in the project. Click on an item on the left, and the pane on the right will become an associated data form.
A First Look at the Tree Diagram
Notice that there is a downwards arrow to the left of the project item. Click on it, and see that the tree collapses to hide the descendent items attached to the project. The arrow icon reorients to face right, to indicate a collapsed list. If the arrow is clicked again, the list expands, and the Child items reappear. Any Parent item can be collapsed or expanded this way.
Note: Child and Parent items will often be referred to in this manual. A Child item is one that is attached to the Parent, and is of a lower order. A Parent item can never be attached to a Child item. As an example, a Meter is a Child of an Area, and an Area is a Child of a Site.
Clicking on any item in the Tree Diagram will bring up corresponding data forms in the right pane.
The Left Side Menu
In addition to the left and right panels, Option C has a hidden menu bar on the far left, which is currently collapsed. Click anywhere in the empty left margin of the window, to bring up the menu. You can also click the double arrows, top left, to expand the menu:
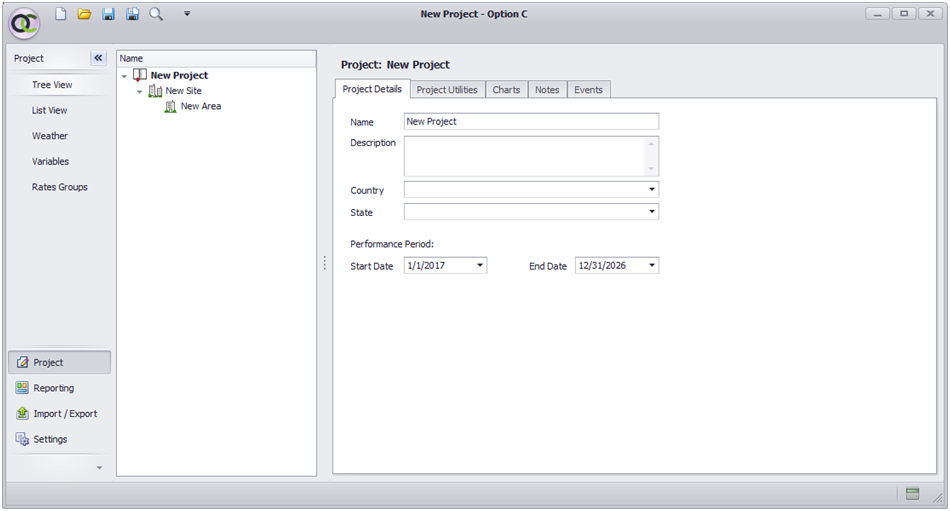 Fig 1.3: The Left Side Menu (Expanded)
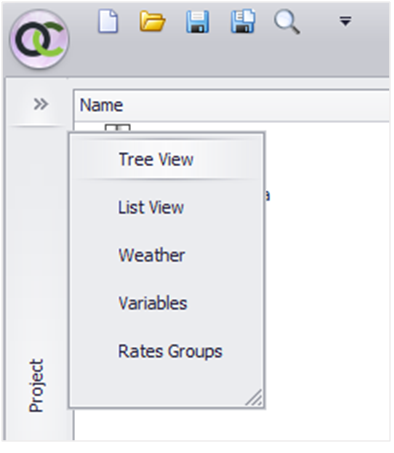
Fig 1.4: Clicking the Margin to Show the Left Side Menu (Collapsed View)
The left side menu allows access to certain project items: Weather, Variables, and Rates Groups. These will be discussed in full detail, further on.
The left side menu also provides access to the List View.
List View: A Different Way to View Your Project
We are currently in the Tree View, as shown by the highlighted selection in Figure 1.4, above. In this view, the Project Tree Structure is displayed in the left panel, as we have seen thus far.
The List View offers another way to view and search your project items. It will not be of much use now, in our current, small project. However, it is a useful way to quickly navigate larger projects, such as the example in Figure 1.5, below:
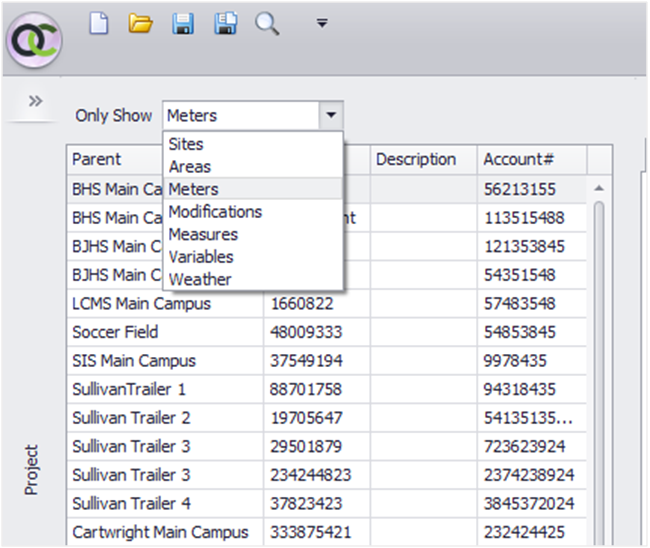
Figure 1.5: Option C List View
In the List View, your project items will be shown in a list-style view. The items in your project can be listed by nearly any item type and sorted by Parent, Name, Description, Account Number, etc. Clicking on the column headers, such as Parent, will sort the items by that column.
Let’s return to the Tree View, and take a closer look at the Project items.
A First Look at the Data Pane
It is time to edit our Project items. To do so, we will select items from the Tree Diagram, and input data into the right pane. Select the Project item in the Tree Diagram as shown in Figure 1.6. The Project Data form will be shown on the right pane. Notice there are several tabs across the top of the right pane. Items can have one or more tabs, and these will pull up the different pages associated with the item. Click on the Project item tabs to see the different pages available. Don’t worry about specifics yet. We will revisit these data forms later.
 Figure 1.6: The Data Pane
Try exploring the data panes of the Site and Area project items as well.
Setting User Options
To access the Option C Settings, click the Settings icon, in the bottom left of the window:
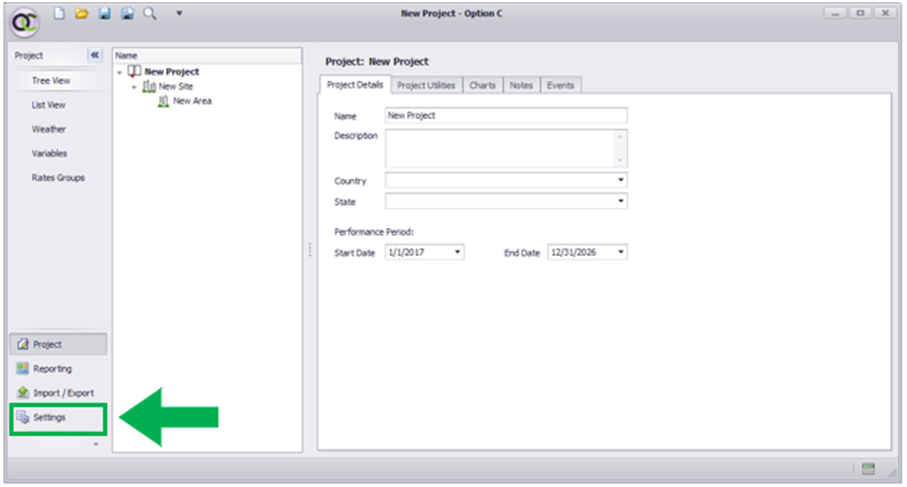 Figure 1.7: Accessing the Settings
The Option C Settings will appear, as shown below:
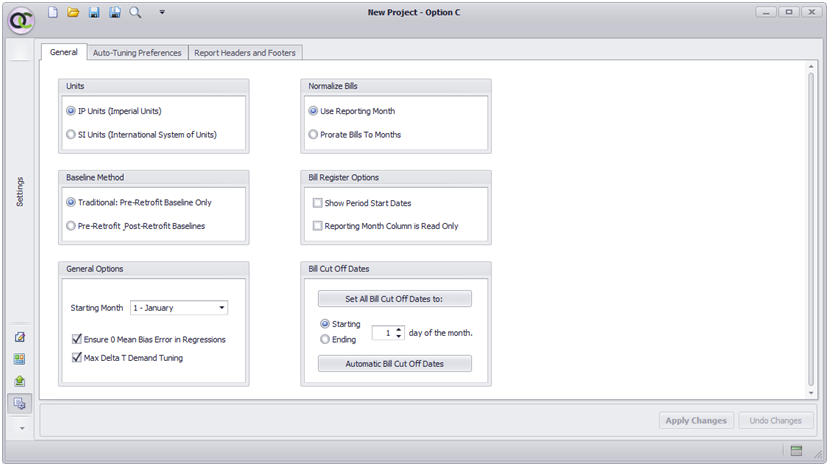 Figure 1.8: Option C Settings
In the General tab, you may select between IP or SI units, how to list bills for reporting, and what Starting Month to use in your reports. Certain tuning options also appear here, as does the option to set a global bill cut off date across your project.
Make your selections, then feel free to browse the other tabs of the Settings.
Save and Close the Project
We’ve now had our first look at Option C, and navigating the user interface of our open project.
At any time, you may click the Option C icon, in the top left. This returns us to the Option C Main Menu. Clicking the logo once more returns us to the open project. From the Main Menu, save your project, by clicking ‘Save As…’, on the left. You may also click the Save icon, in the top margin of the program window. (The margin icon is visible at all times.) After saving, in the Main Menu, click Close, to close your project.
That concludes the first lesson. When you are ready, you may move on to the second.
<--Previous lesson Next lesson–>
- Lesson 1: Getting Started in Option C
- Lesson 2: Setting up Your Option C Project
- Lesson 3: Importing Bill Data into Your Option C Project
- Lesson 4: Importing Weather Data into Your Option C Project
- Lesson 5: Tuning Your Data for Weather
- Lesson 6: Adding Measures
- Lesson 7: Adding Baseline Modifications
- Lesson 8: Reporting